
Support
Overview
As a manager, when you are introducing NoahFace to your organisation you should:
To register (or enroll) users to use NoahFace, each user should:
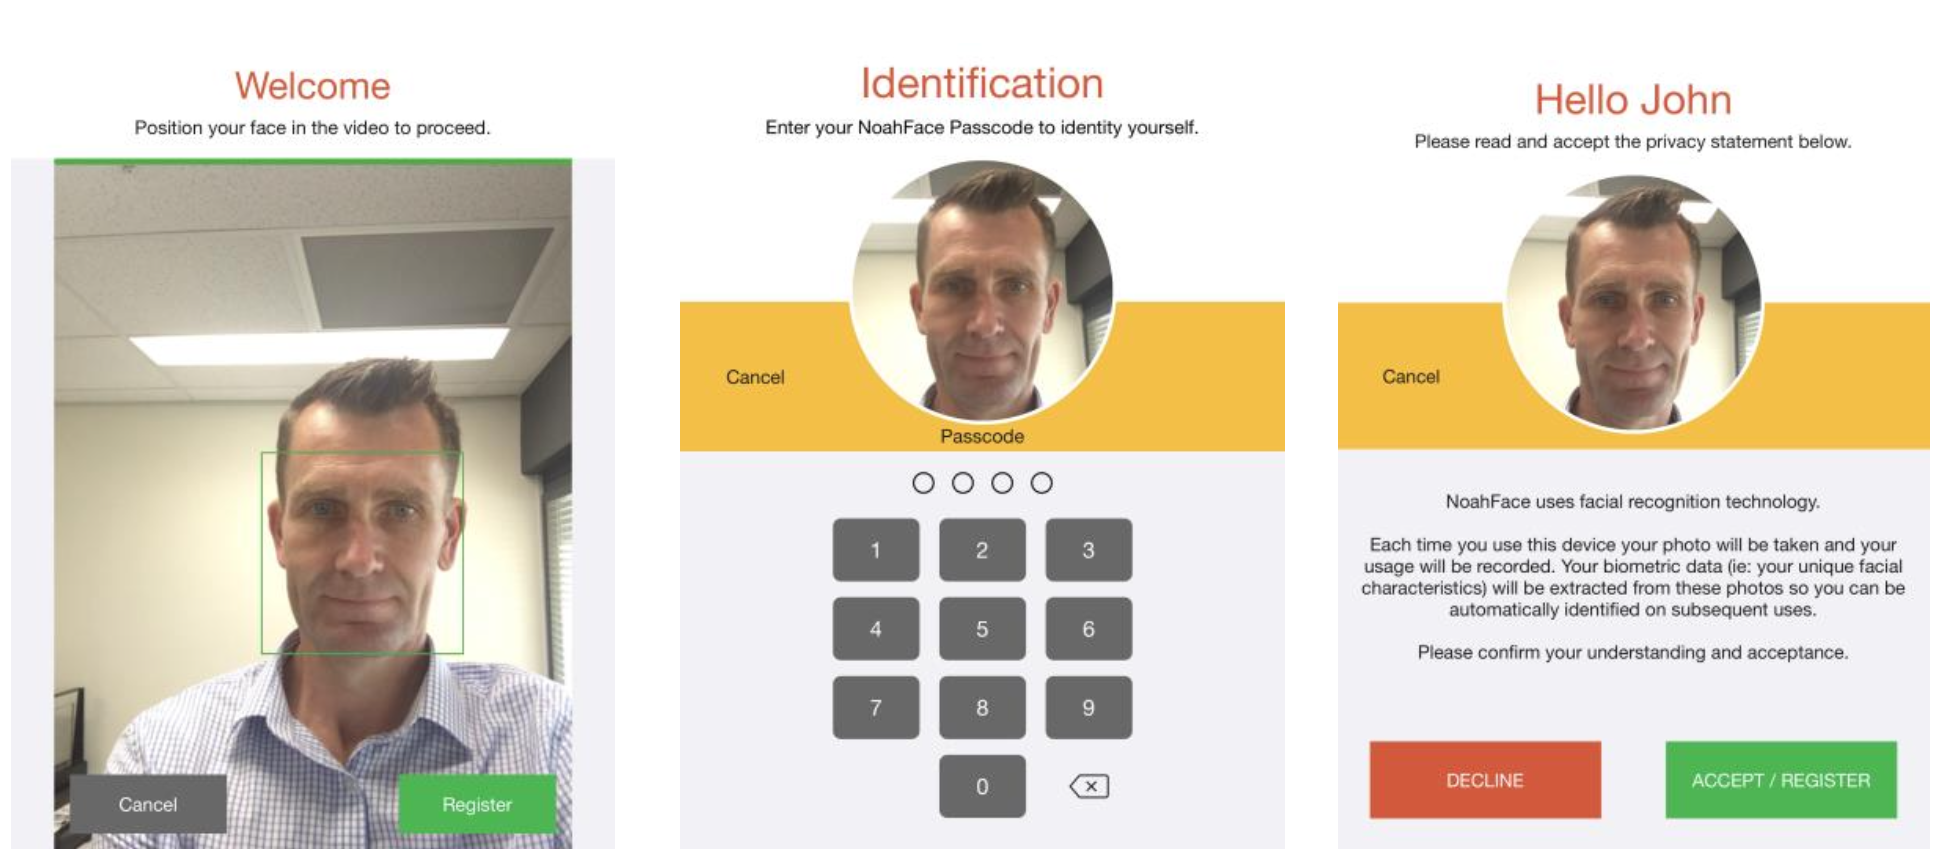
If NoahFace has been configured so that users are allocated their own passcodes, they will receiver these by SMS or Email. When they register, they will see the following screens:
While it is possible for employees to self-register, it is recommended that as a manager you assist them. During the registration process, it is critical that you stand to the side of the iPad so you are not in camera view.
Once a user is registered, you should ask them to test the recognition process by standing in front of the iPad again.
If NoahFace has been configured so that users do not have their own passcodes, then you as a manager are required to confirm their identify during the registration process. When they register, they will see the following screens:
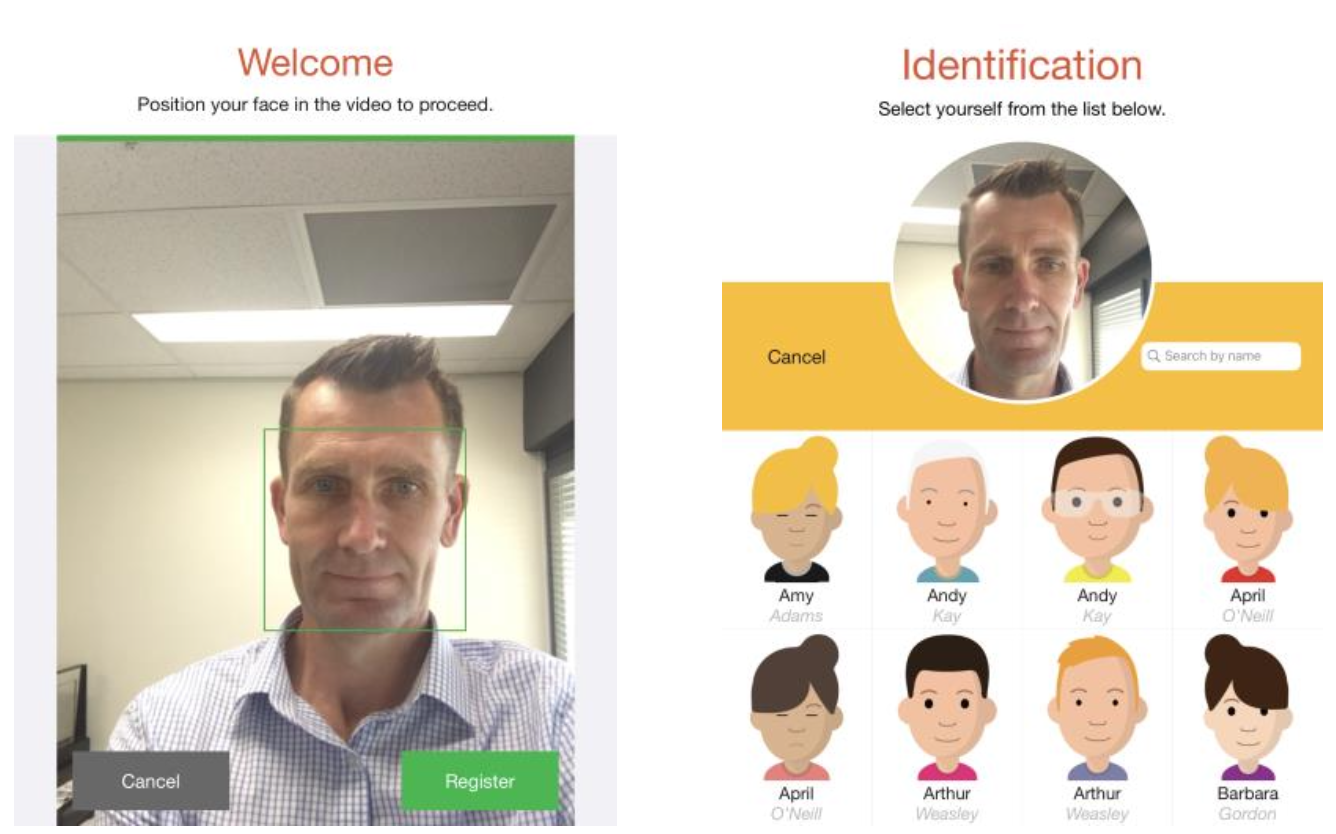
They should select themselves from the list of users – they can search if there are large numbers of users. Once they do this, they need to stand aside, and you as a manager need to confirm their identity using your own passcode.
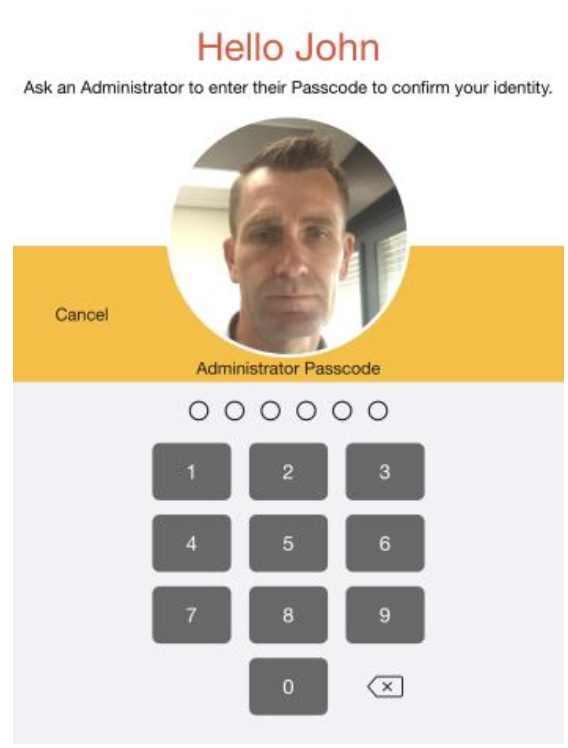
You then need to stand aside, and have them confirm their acceptance of the privacy statement:

Once a user is registered, you should ask them to test the recognition process by standing in front of the iPad again.
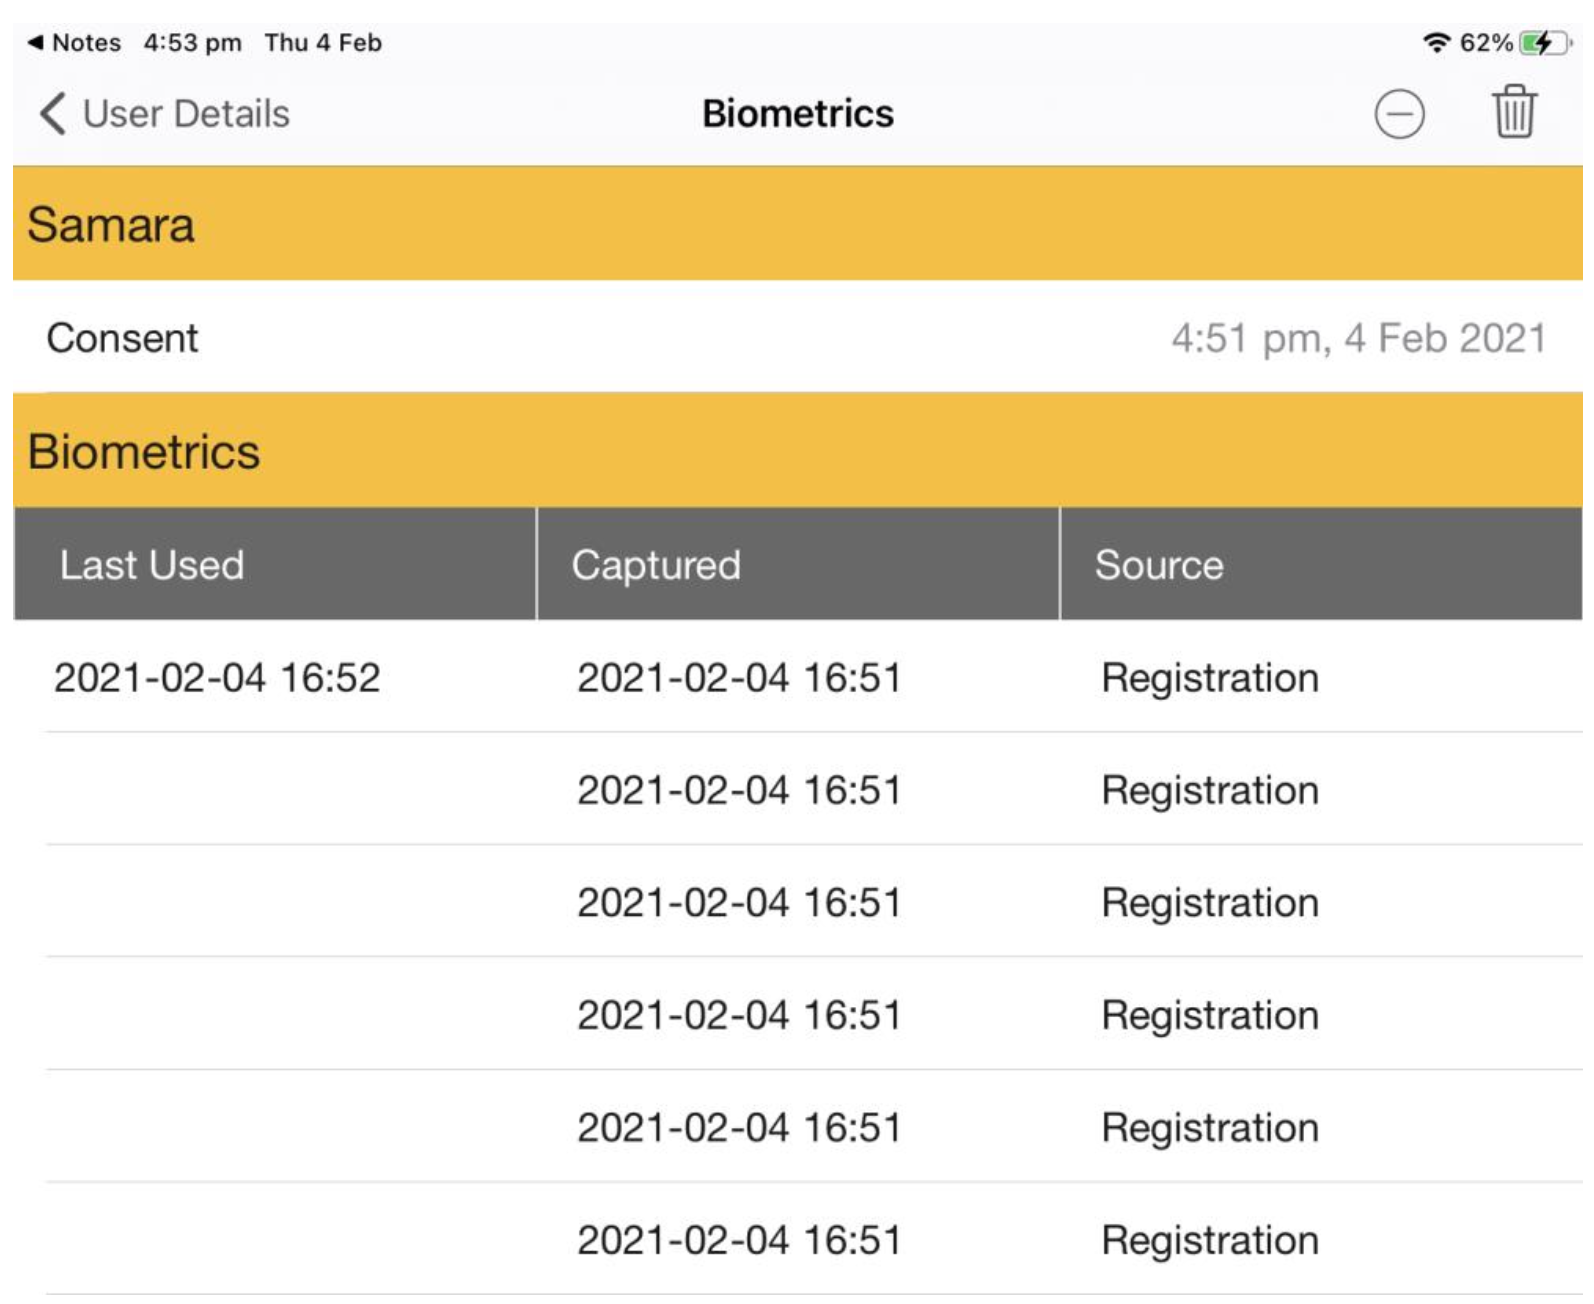
When a user accepts the privacy statement, the date and time of their consent is captured. You can view this information both through the Dashboard:

And within the NoahFace App:
If a user is ever incorrectly recognised, you can view their biometrics within the NoahFace App, and press the delete icon to delete them. You will see the following confirmation:
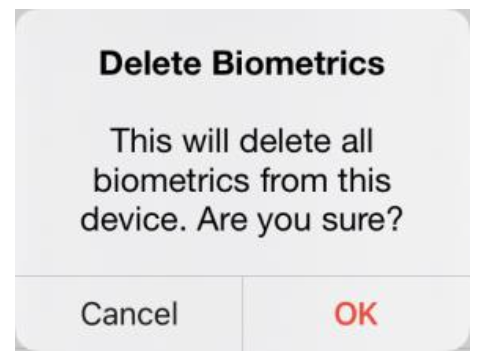
If this user has any shared biometrics stored in the Cloud, they will also be deleted, however, their biometrics on other access points will not be deleted.
The next time the user presents themself to this access point, they will not be recognised and they will be required to re-register.
If a user ever removes their consent, you can press the remove icon next to the Consent date (either in the Dashboard or the NoahFace App). You will see the following confirmation:
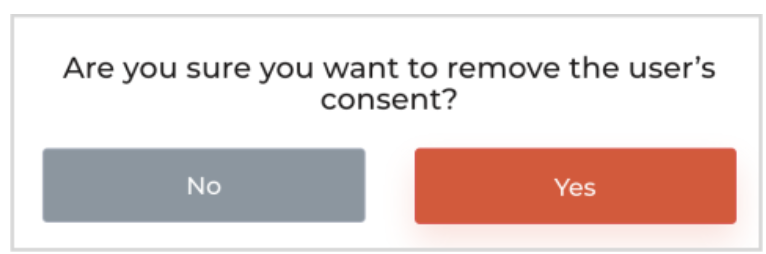
Once confirmed, all biometrics across all access points will be automatically and permanently deleted, and their consent will return to “Not Provided”.
The next time the user presents themself to any access point, they will not be recognised and they will be required to re-register and re-accept the privacy statement.